Visuals all the Way
I remember a time when I used to use my voice for everything in the classroom. I used it to explain what was coming up next, how I wanted students to line up, to provide praise, to provide redirection and to get students to be quiet to listen to instructions. The problem with all this talking was that it left me with a sore voice and wasn’t actually that effective in helping students engage in the classroom. In fact, the louder I was in trying to get the students to be quiet, the harder it was to achieve the silence I was looking for. Then one day, a more experienced colleague asked me, “Have you noticed that loud teachers have loud classes and quieter teachers have quieter classes?” I realised that when it came students not following instructions, lining up quietly and generally staying on track in the classroom, it wasn’t the students who were the problem. It was me!
This week’s post is intended to suggest a few ways that you can use visuals in your classroom for all of your students, not just those students with additional needs who may have an individual timetable. With mask wearing the norm in most schools, this is particularly important at the moment. Protecting your voice and making it easier for students to engage with classroom routines and learning not only looks after your vocal cords, but your blood pressure as well.
Here are my top three tips for using visual in the classroom.
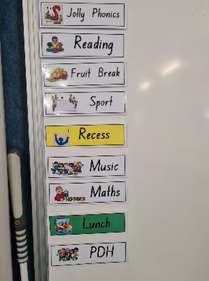
- Have a visual timetable – I know that many teachers already have a visual timetable in their classroom. Its use can be taken it to the next level by actually removing the items from the timetable as you complete them and putting them in a ‘finished box’. This is a common idea for students on the Autism spectrum, but using it with your whole class is a great way to keep your students on track. You can make it even more effective by having the same timetable in every classroom in your school. That way if you have to split classes because you can’t get a relief teacher there will be certainty for every child. The photo below comes from the wonderful Liz F's classroom.
2. Use visuals to give general classroom instructions. The picture below is of my real-life (badly in need of an update) lanyard from my last school.
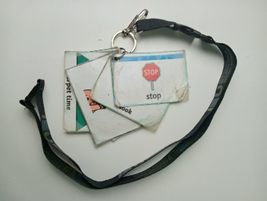
It didn’t have everything single thing we did in the day on it, but rather the key instructional visuals that I needed including:
-The visuals from the school values
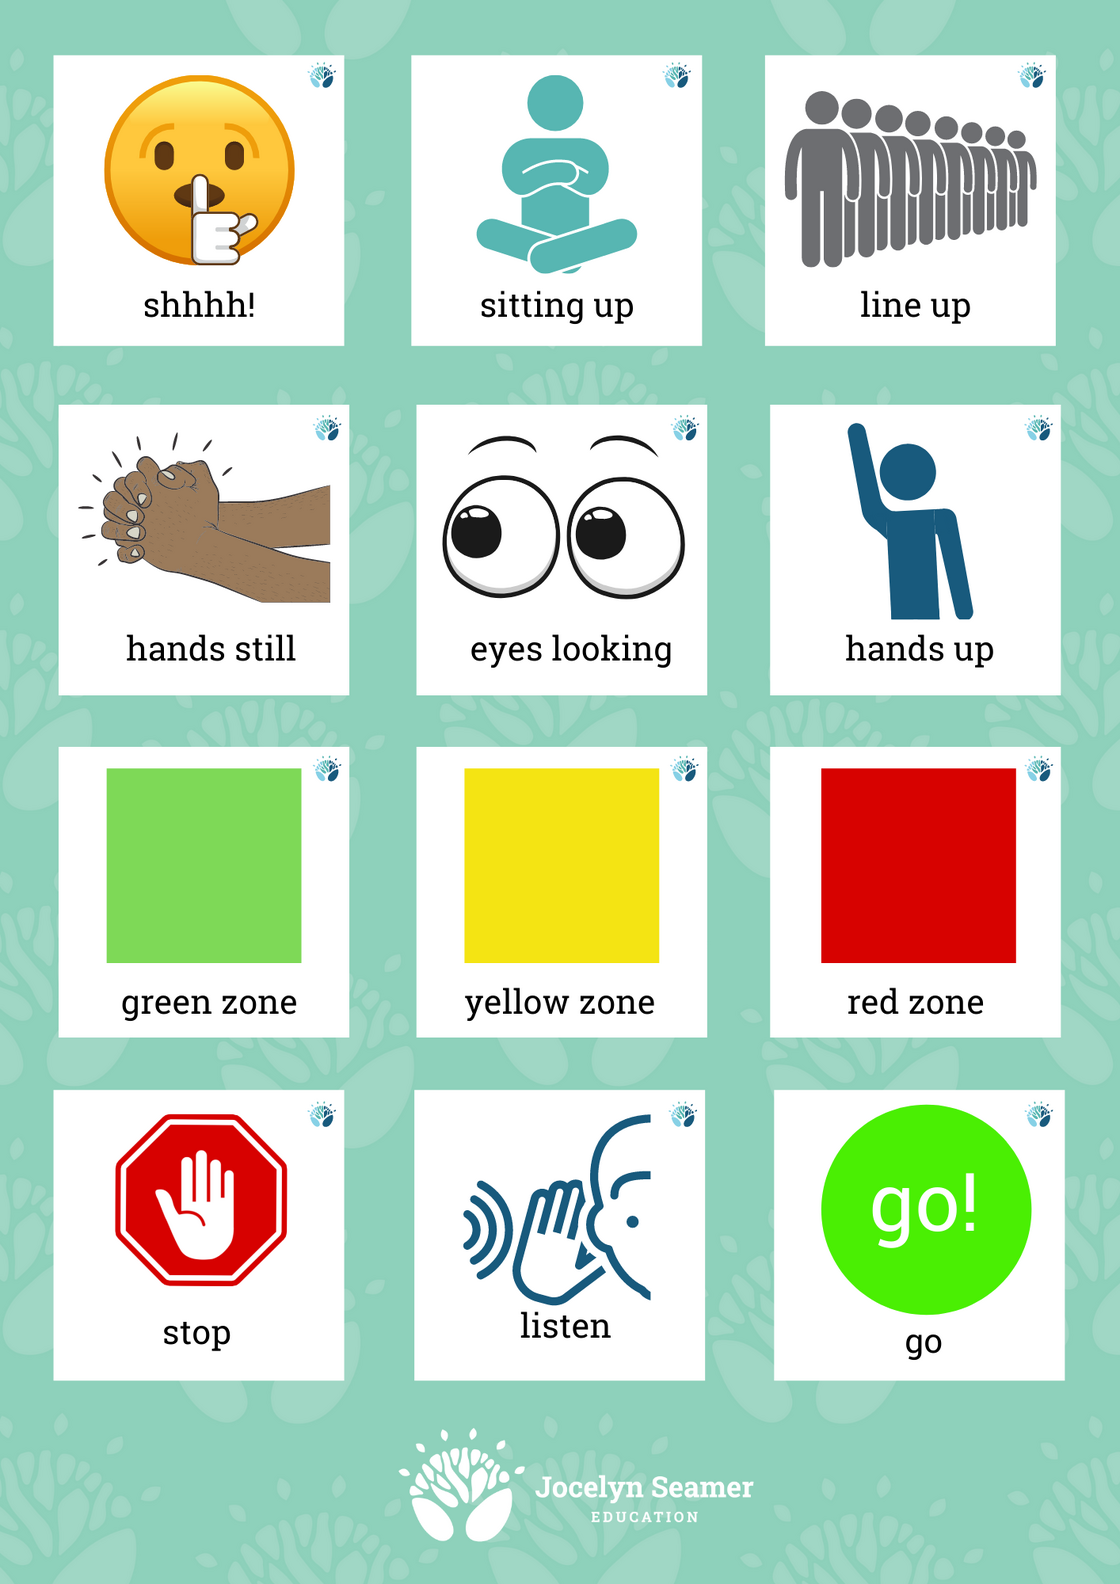
-Zones of regulation colours
-Sssssh
-Picture of someone sitting on the mat
-Lining up
-Eyes looking
-Stop
-Listening
Whenever I would normally have used my voice to give students instructions, I switched to showing the visual. It was amazing how quickly students responded when I put my finger to my lips and showed them the ‘ssssh’ visual. No more ‘nagging’ or endlessly imploring them to “please be quiet”. If children were mucking around while lining up, I showed the ‘lining up’ picture and, quick as a flash, they stood straight like soldiers ready to go wherever it was we were going. If a student was messing around on the mat (actual messing around, not having difficulty because of a sensory challenge), I could show them the picture of legs folded and give them the message I needed to without interrupted the flow of the lesson and distracting the other students. When my students went off to science or PE with another teacher, the lanyard went with them so that the teacher could use the same communication tools that I used in the classroom. Looking back, it would have been better if every teacher had the same set of visuals across the school.
You can download a free set of lanyard visuals at the bottom of this post.
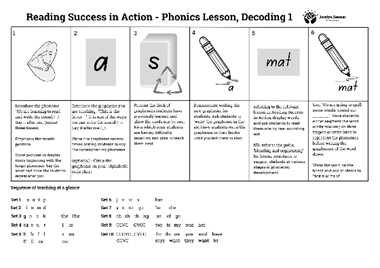
3. Use visuals for instructional routines. One of the reasons that our younger students may find it difficult to pay attention all the way to the end of a lesson is that they have no idea how long it’s going to last. They feel like that phonics lesson is going to go on forever. It’s a situation that I call the ‘are we done yet?’ phenomenon. Students start out strong, then gradually lose focus before reaching a point where they can no longer keep their attention. You can help your students to pay attention (and keep yourself on track) but making an A3 visual of what you are teaching. Instead of you being the only holder of the information about what’s coming next, make the students aware of the details too. Pop the A3 on the board and move a magnet along as you teach each part. I guarantee that if you forget to move the magnet, one of the students (usually the one who needs it the most) will remind you. The example below relates to book 1 of Reading Success in Action, but you could make one up for any program or low variance teaching routine.
Using visuals is not just for students with additional needs. They help our whole class stay on track and feel safe in the classroom. Having ways to support and engage students without straining our voices means that we are also looking after ourselves. Everyone wins.
.

2 comments
Thank you so much for the weekly updates and blogs. It definitely helps to keep me on track and gives me prompts as to what else I can do to support the students in my class. Is it possible to get a copy of the visual instruction routine example you have shared from the Reading Success in Action?
I've been thinking about making a set of these visual Jocelyn, so thank you much for saving me the trouble! Love the lanyard idea too so they are always close to hand. Can I ask ask what you do with the Zones of Regulation colours? Is that to remind children that they might be in a certain colour zone? Thanks
Leave a comment